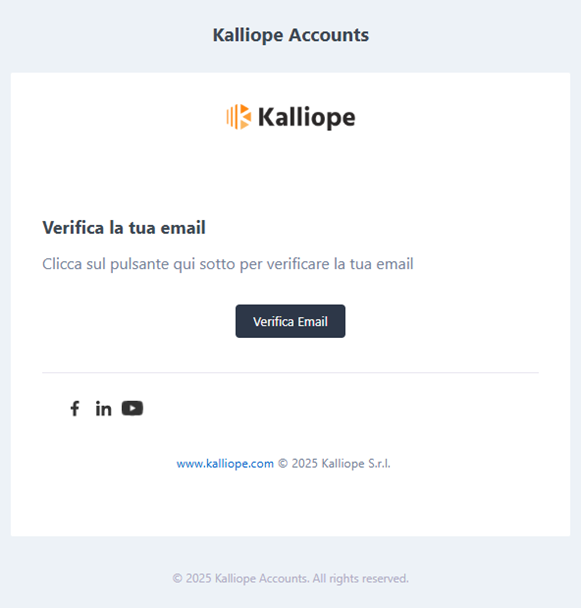
To proceed with the authentication you must open the verification email Email Verification sent by Kalliope Accounts [email protected].
Click on Verify Email and generate a password (possibly different from your Google login one).
As a further confirmation, you need to set up the Multi Factor Authentication (MFA): the system allow you to choose between authentication via SMS and App authentication. We recommend choosing the Authenticator option as SMS validation is deprecated and less secure.
[* For those who had previously set up their mobile number, simply access the link https://accounts.kalliope.cloud, entering your credentials to log in to Kalliope.
- Click on Edit (blue button on the right side of the section Two-factor authentication method);
- Select Authentication app and Continue
- Scan the QR Code via Google/Microsoft Authenticator or other authentication app (previously downloaded and installed on smartphone or tablet, both Android and iOS), enter the generated code and click Next. The change will be saved and, at each new login, the Token generated by the authentication app will be requested after entering Username and Password. ]


INSTALLATION: Enter https://omnia.kalliope.cloud/webcti/ in the search bar
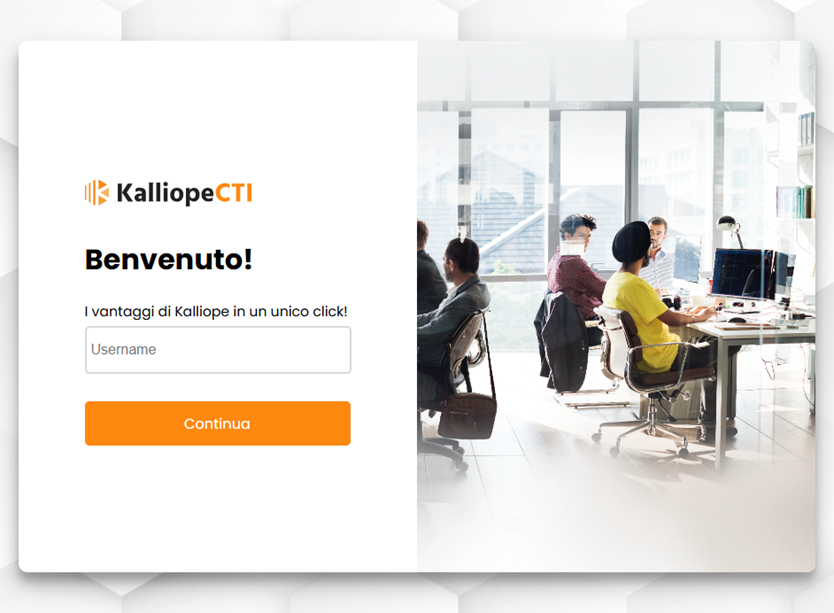
The login screen appears as follows:
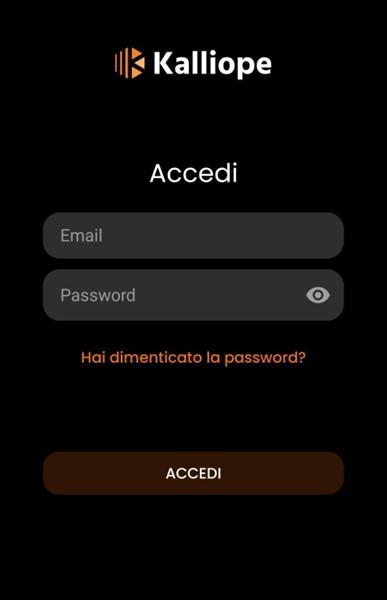
Then enter your login name (the email address) as Username and the password you have just chosen.

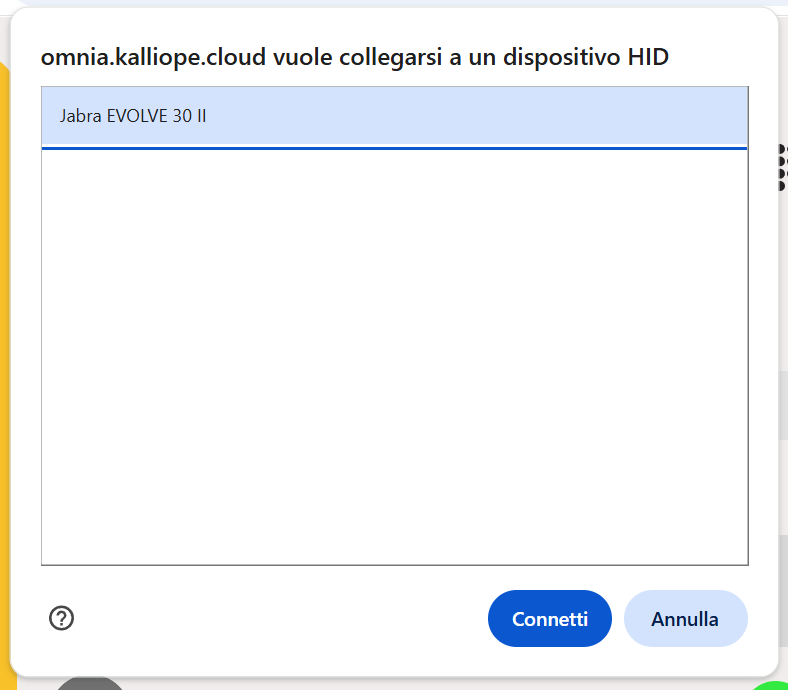
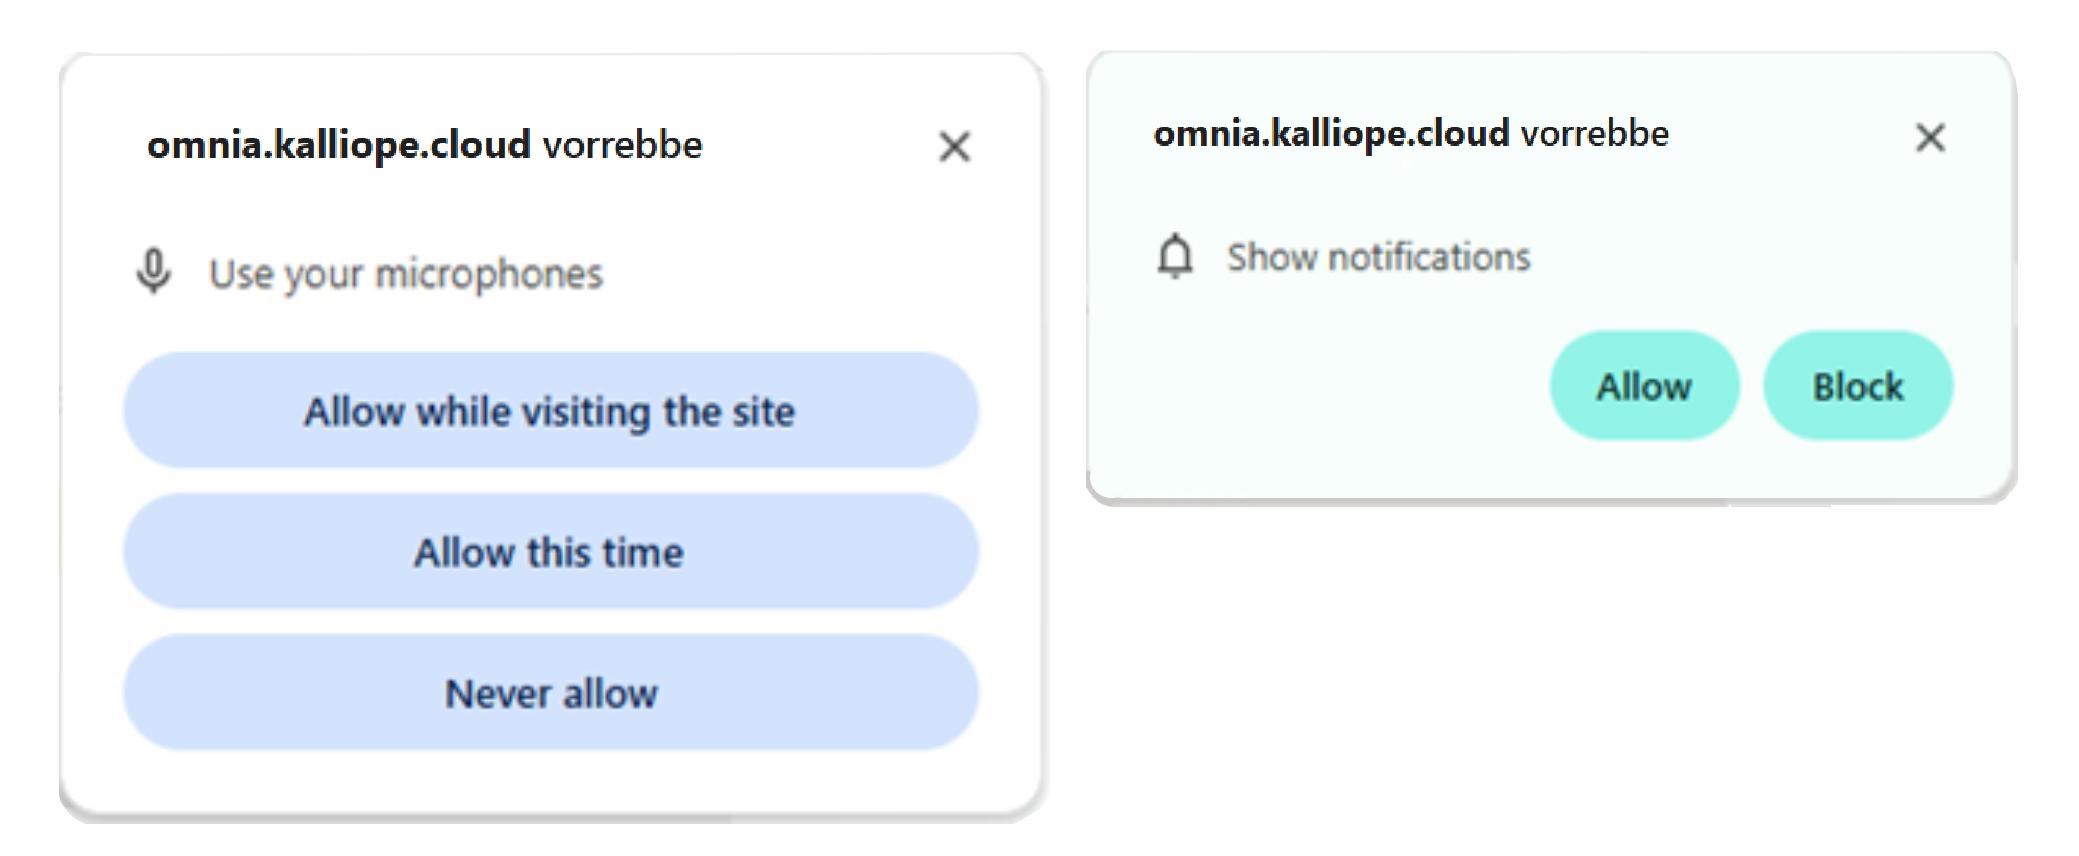
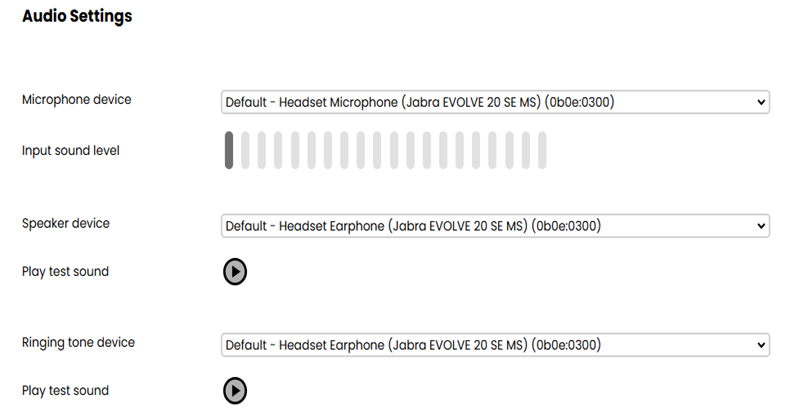
Click on it to allow the site to use headphones, microphone, and send notifications. Confirm clicking on Connect and Allow.
In fact, if access to the microphone and audio devices is not allowed, it will not be possible to receive or make calls.
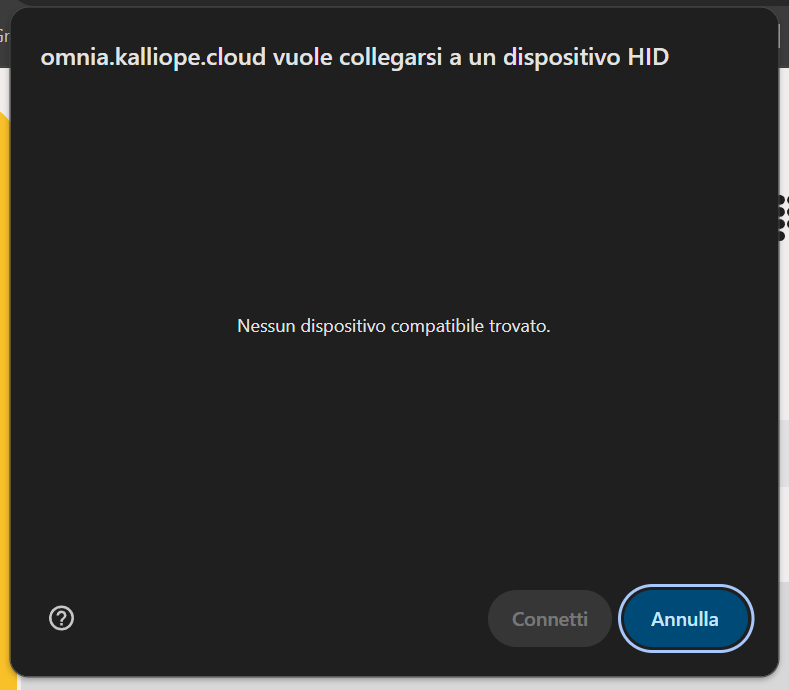
In case this message appears (Omnia wants to connect to a HID device - No compatible device found), click on Cancel to continue.
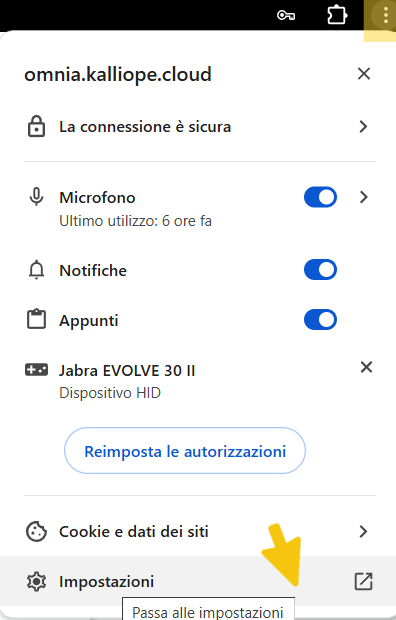
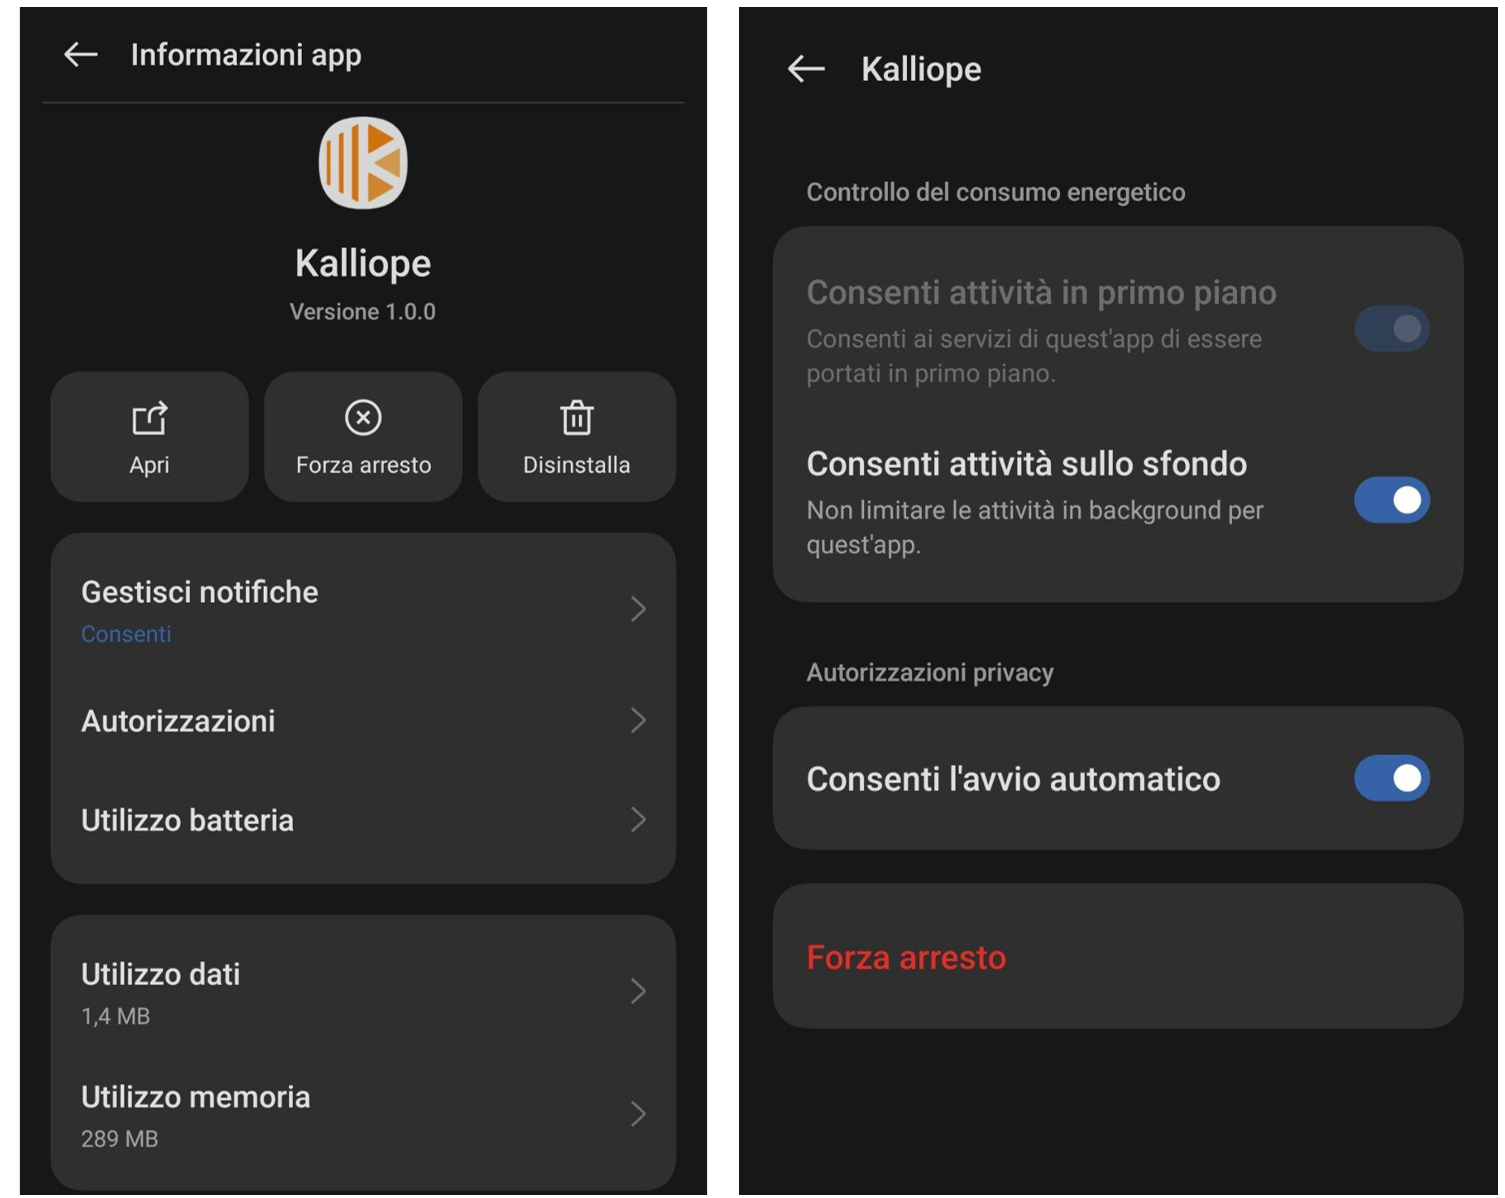
The related settings can still be changed at any time by clicking on the symbol to the left of the link in the browser bar or on the three dots in the upper part right of the webapp and then on App info.
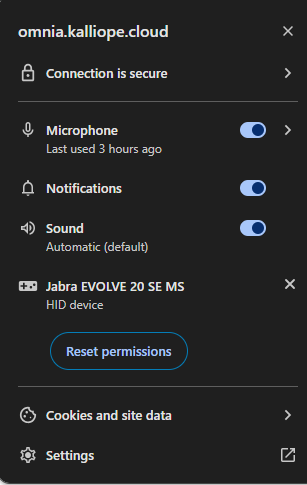
Permissions must be enabled for Microphone, Notifications and Audio. If one of the three is not present, you must click on Settings (under Reset permissions) and choose Allow close to the corresponding authorization in the list (changes are saved automatically).
The configuration must be repeated in the same way for the browsers used on other devices as it is not possible to have multiple active sessions simultaneously with the same user.

If you want to use web telephony from another browser, you must log out by clicking on the user icon in the upper right and the on Log Out.
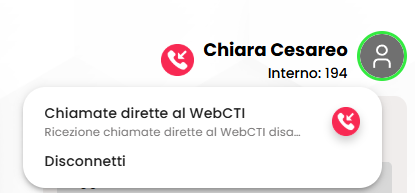
IMPORTANT: Check that there is nothing next to the user’s name. If there is the red logo shown in the picture, click on the icon of the user and then on the same red logo next to Direct calls to WebCTI (until the adjacent logo becomes green and disappears from the top)

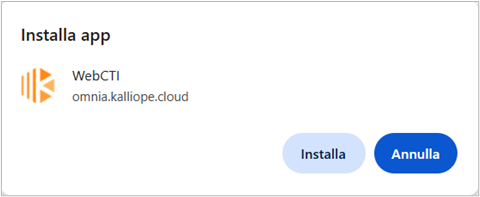
Confirm, clicking on Install
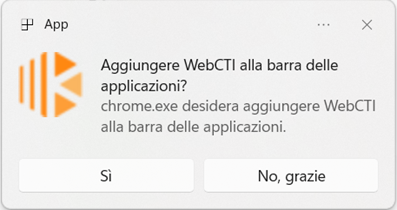
For convenience, add WebCTI to the taskbar
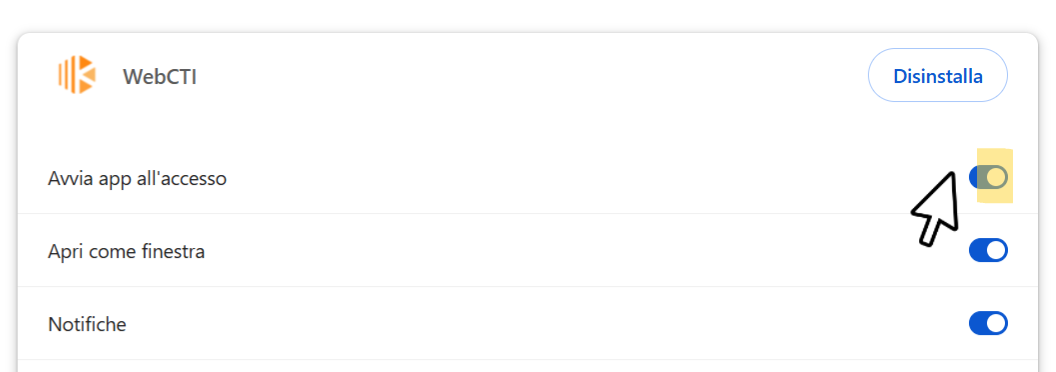
By clicking on the symbol to the left of the link in the browser bar or on the three dots in the upper part right of the webapp then on App info and finally on Settings it is also possible to enable the app to start automatically when accessing the PC.
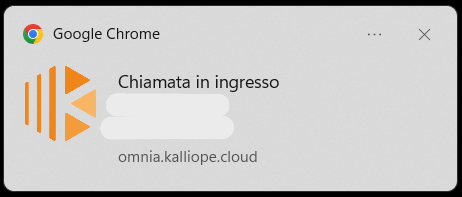
When you receive a call, the phone rings on both devices (PC and smartphone if both are configured). In addition, if the browser or webapp is minimized or covered, a popup notification appears at the bottom right of the desktop.
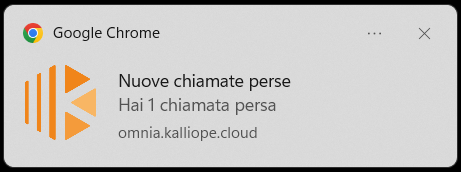
Missed calls are reported in the same way.

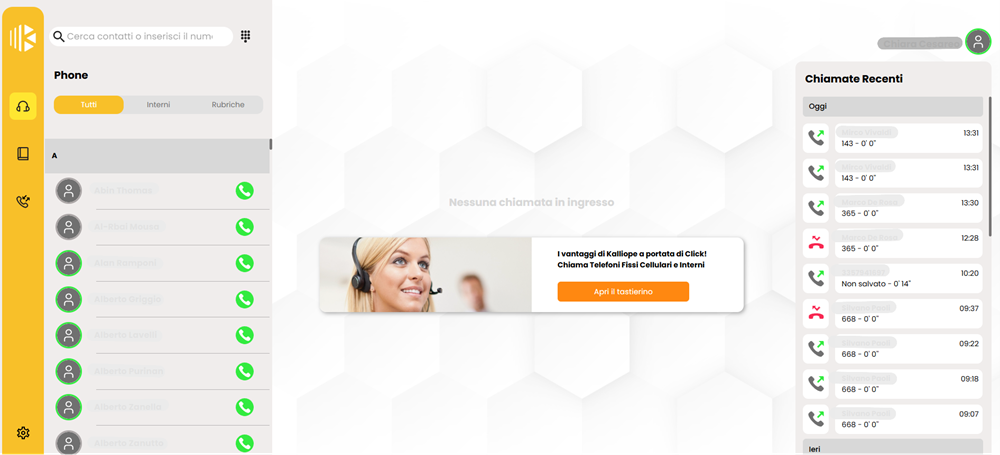
Calls
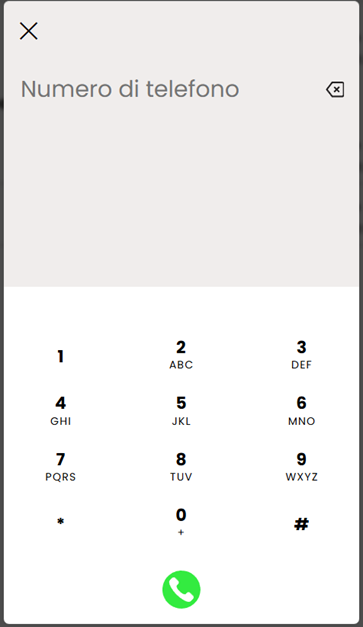
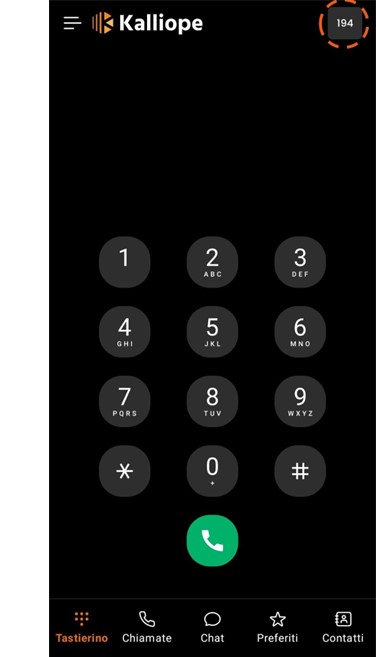
Clicking the orange box in the center or the keypad in the upper left, you open the dialpad where you can type or paste the phone number to call.

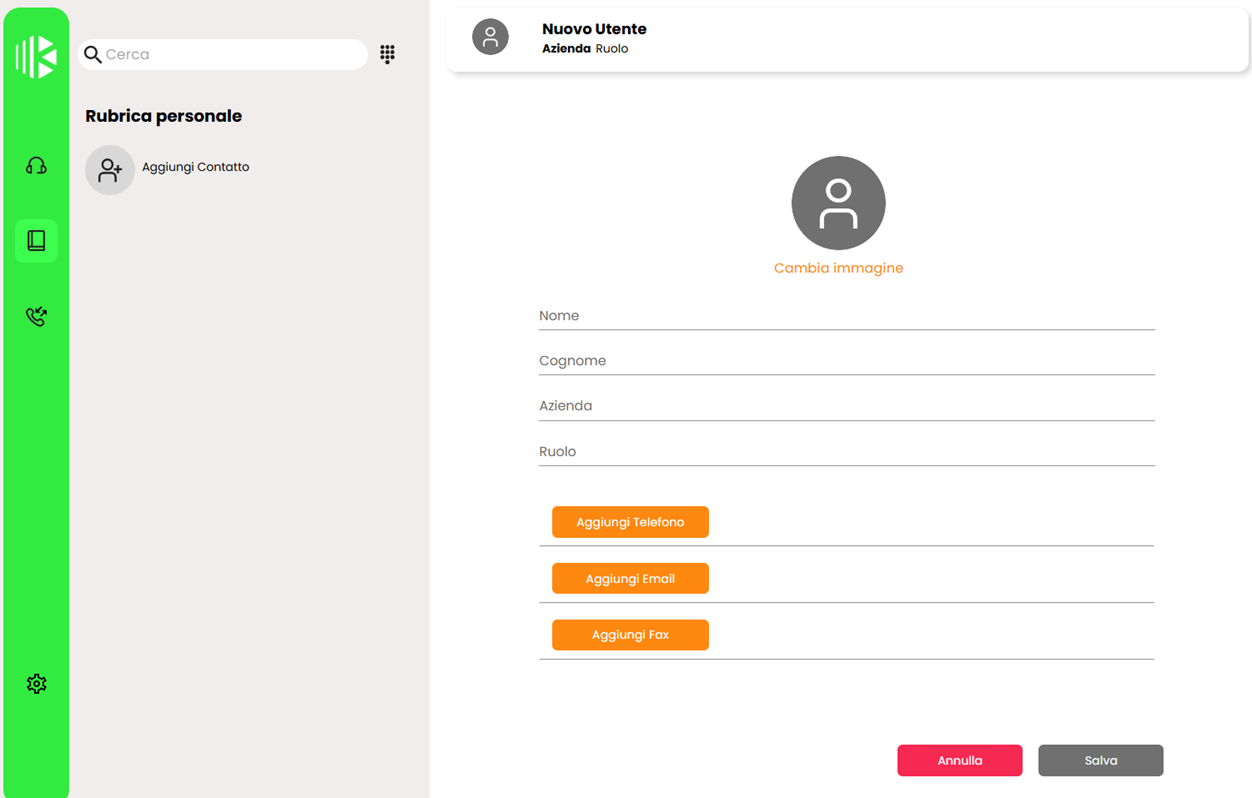
Alternatively, you can enter the contact's name in the 'Search Contacts' bar."

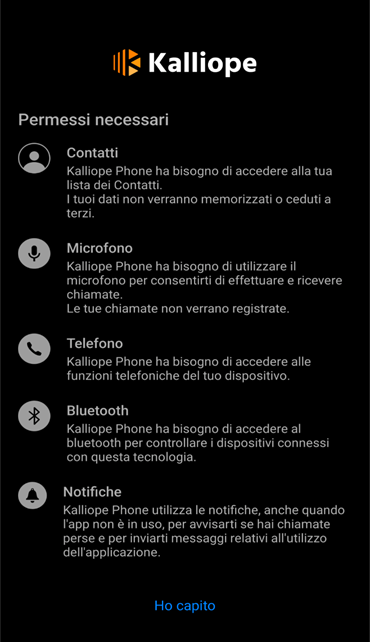
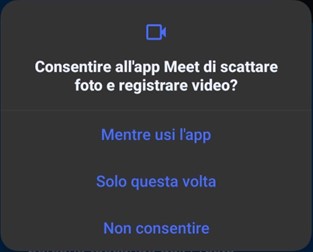
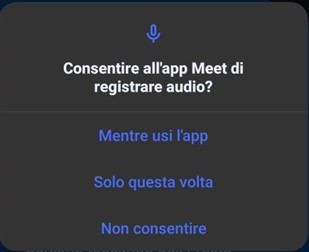
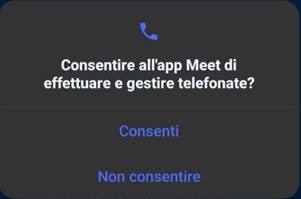
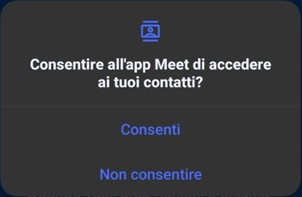
After installing the app, grant all the required permissions (listed in the figure) by clicking on "I understand" and following the setup wizard:
Then log in with your own username and password (the same used in the web version).
The phone is connected when on the main screen
in the upper right appears: ID: <num> where num is the number associated with the user.
The main screen has various sections:
- In Keypad you can directly dial the desired numbers
- In Calls are listed all the made and incoming calls (section All), and those not answered (section Lost)
- In Chat you can start a message conversation with individual users or groups (via the + orange sign)
- In Favorites you can add the numbers to contact more frequently

By clicking on the three grey lines in the upper left side of the logo, you can access the Menu
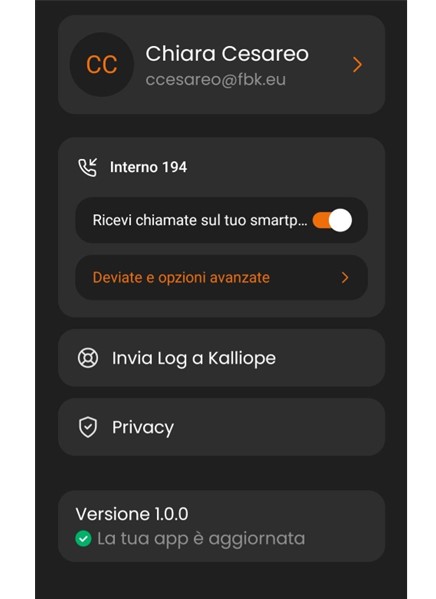
where you need to select the button next to Receive calls on your smartphone in order to use the service.
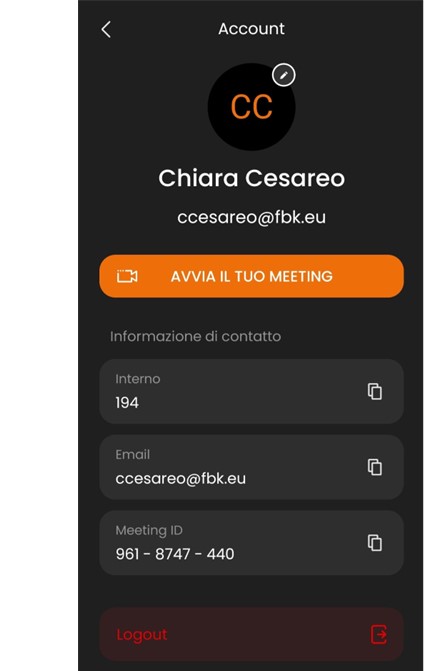
By clicking on your name at the top, you will access the Personal Account section where your details are displayed and you can directly start a video call.

To call internal users it is recommended to use Google Meet with your institutional account, as it is a tool integrated within the Google systems used in FBK and PAT (so the list of people is directly available without the need to know their number) and it works anywhere and in any situation (like Whatsapp, but in an integrated mode).
From your PC click on meet.google.com, select the Calls mode and enter name or e-mail of the internal person to contact, choosing between Voice or Video call.
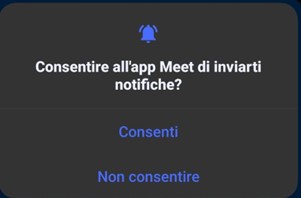
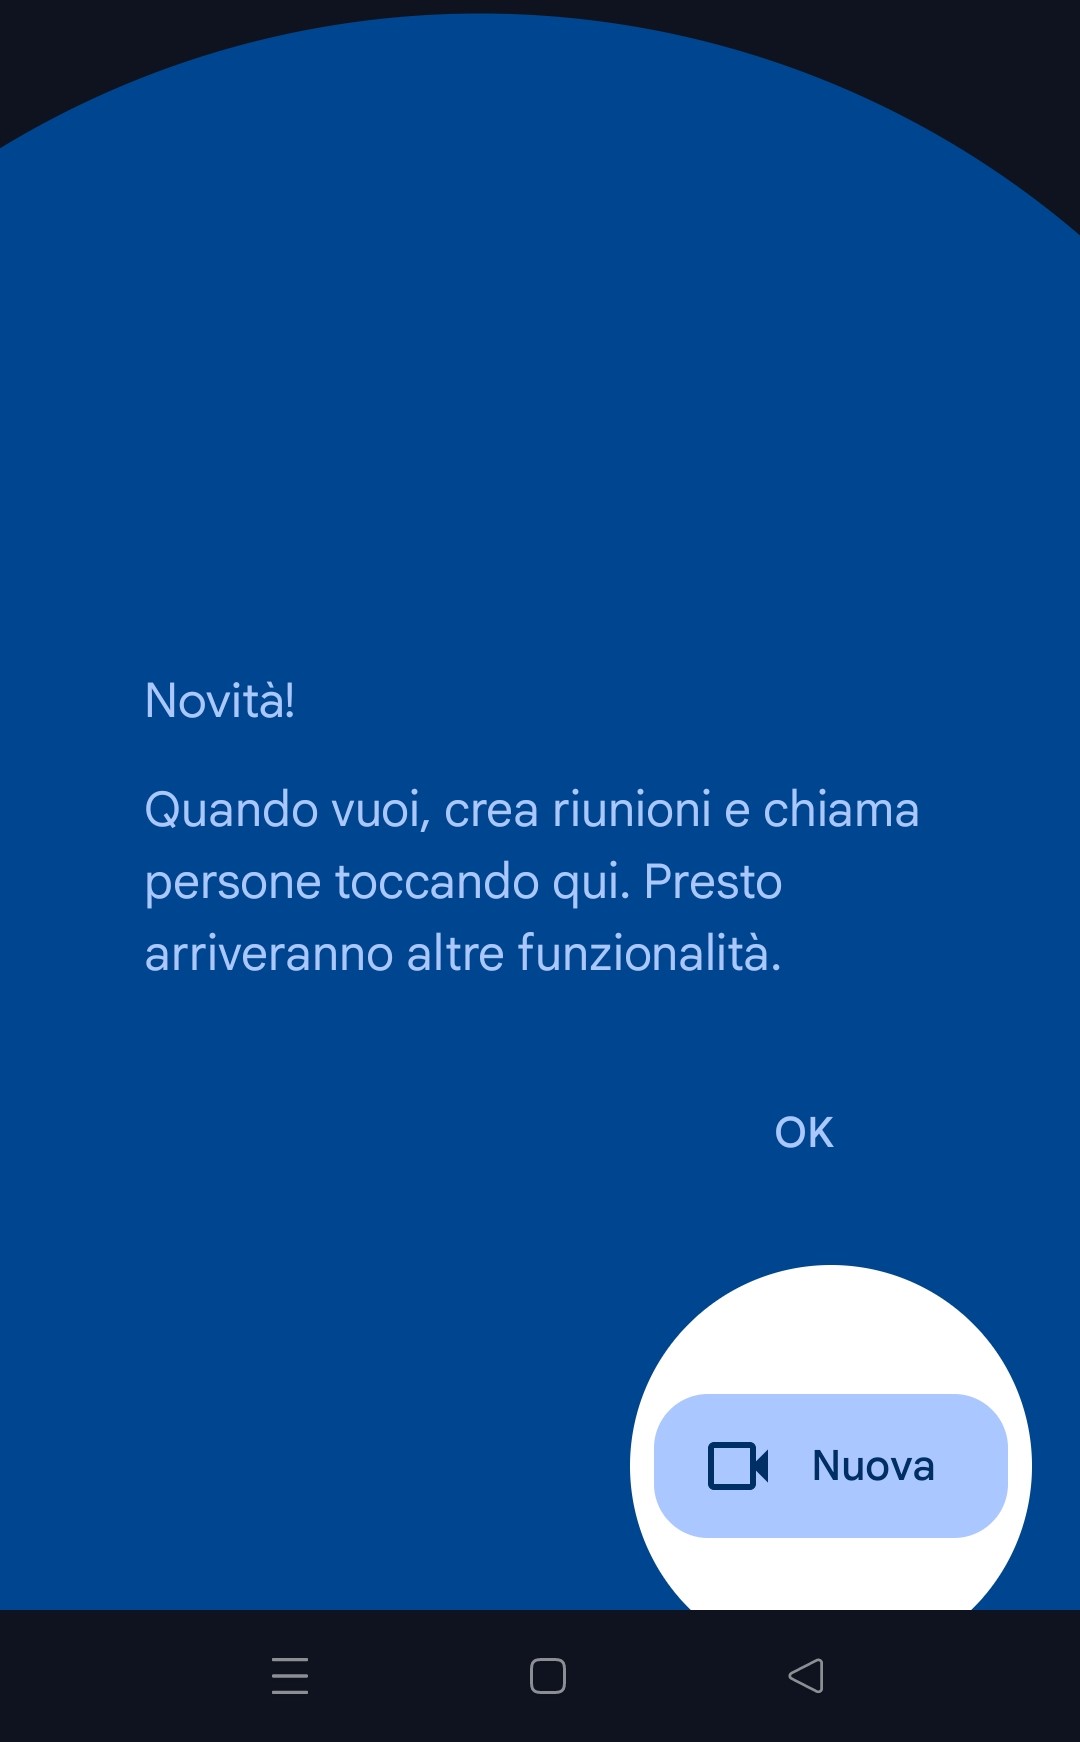
From your Android, iPhone or iPad device, open the Meet app and sign in with your institutional account.

To start a call:
- Click on New, enter a name and select the contact from the suggested ones
If you see the message "This contact cannot receive calls. Share a Meet link" (that person has not opened the Meet app to receive updates yet) click on Create to share the link and Share; you can also make group calls by clicking on New Group;
- Click on Call
Before joining a call, you can:
- Enable additional encryption;
- Turn off or reactivate audio and video;
- Add special effects, backgrounds or filters;
- To find information or view the history with a contact, click on the contact’s name, on Menu in the top right and then View details;
- To view your settings click on the profile picture, Manage your Google Account and then Personal information.